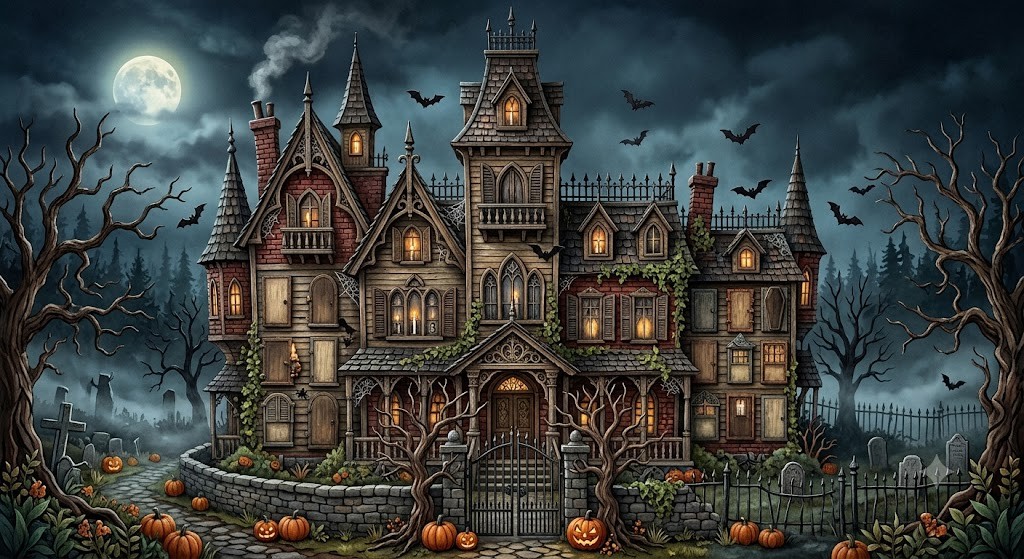
Welcome to the season

Halloween at Paranormal Country

Hang an October Wreath, print free masks and safer trick-or-treat certificates for the kids, and count down to our daily Halloween Calendar.

Until the Halloween Calendar opens

Days

Hours

Minutes

Seconds

A short history

All Hallows' Eve and beyond

Halloween is often called All Hallows' Eve — the vigil before All Saints' Day. Its roots reach further than costume shops: harvest festivals, ancestral remembrance, and stories of a thin veil between the living and the dead appear in many cultures. Names change; the instinct to mark the turn of the year stays familiar.

  1. All Hallows' Eve

    Christian tradition

    The night before All Saints' Day (1 November) — “hallow” means holy or saint.

  2. Samhain

    Gaelic / Celtic

    An ancient festival marking the end of harvest and the turn toward winter, when the boundary between worlds was said to thin.

  3. Calan Gaeaf

    Welsh

    The first day of winter in the Welsh calendar — folklore of spirits, fire, and omens still colours the season.

  4. Día de los Muertos

    Mexico & Latin America

    The Day of the Dead honours departed family with ofrendas, flowers, and remembrance — overlapping late October and early November.

  5. Obon / Bon Festival

    Japan

    A midsummer festival of ancestral return in many regions; like Halloween, it centres on welcoming and guiding spirits with light and ritual.

  6. Hop-tu-Naa

    Isle of Man

    A Manx cousin of Halloween, with turnip lanterns, songs, and door-to-door visits long before plastic pumpkins arrived.

A seasonal tradition

The October Wreath

Christmas has the tree. Halloween can have a front-door ritual too: hang a Halloween wreath on 1 October — the same day the calendar opens — and keep it up through the season. DIY, shop-bought, or handed down; what matters is marking the month together. Share yours with #OctoberWreath.

  1. 01
    Hang on 1 October

    When the Halloween Calendar unlocks its first door.

  2. 02
    Make it yours

    Craft one, shop one, or rescue one from the loft.

  3. 03
    Share the season

    Post a photo and tag Paranormal Country.

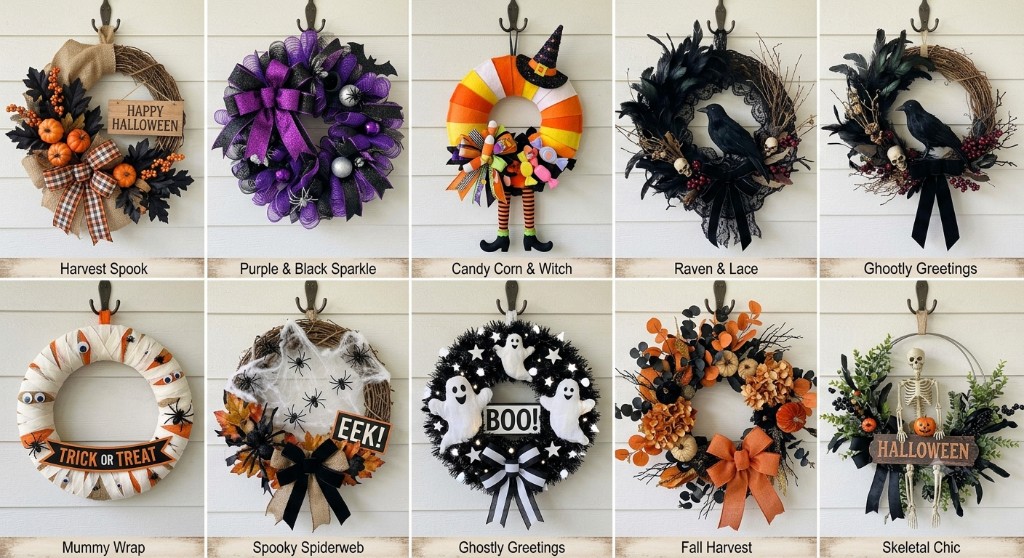
Ten handmade Halloween door wreaths displayed on a wall, each with a name label

This season's door gallery

Harvest Spook · Purple & Black Sparkle · Candy Corn & Witch · Raven & Lace · Ghostly Greetings · Mummy Wrap · Spooky Spiderweb · Classic Crow · Fall Harvest · Skeletal Chic

Make one below · Download full PDF guide

DIY how-tos

Ten door wreaths, step by step

Materials lists and instructions from our Halloween Door Wreath guide. Print the PDF if you prefer to craft offline.

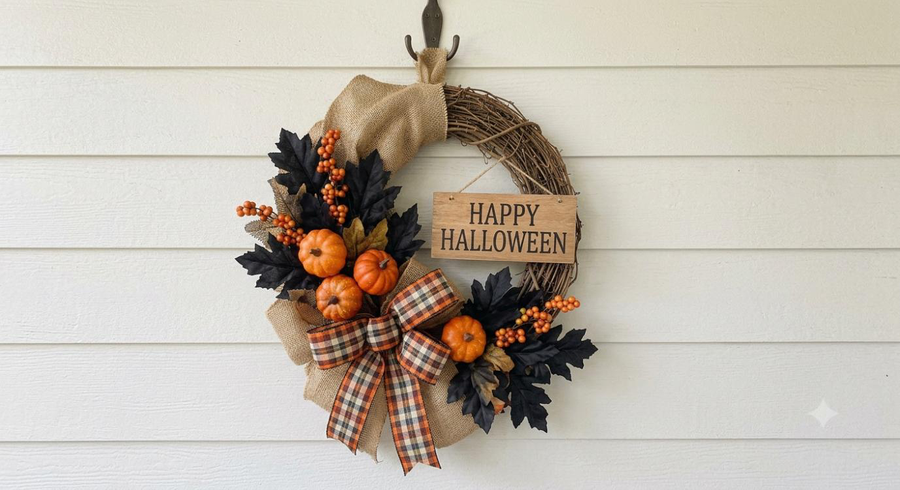
Harvest Spook Halloween door wreath

01

Harvest Spook

A classic rustic-glam autumnal look that combines natural textures with Halloween touches.

Materials

  • 18″ grapevine wreath form
  • Large pre-made burlap bow (natural colour)
  • Smaller plaid ribbon bow (orange/black/white)
  • A “HAPPY HALLOWEEN” wooden plaque
  • Large black silk leaf picks (about 6–8)
  • Artificial orange berries on wired stems
  • Small decorative faux pumpkins (5–7, varied sizes)
  • Floral wire
  • Hot glue gun and glue sticks

Steps

  1. Attach the plaque: centre the wooden sign over the main opening and secure it to the grapevine with floral wire woven through the sign’s holes.
  2. Add the burlap bow to the upper-right area, nesting it under the plaque.
  3. Secure the plaid bow near the bottom-right/centre as a secondary accent.
  4. Group 3–4 black leaf picks near the top-left; add a couple more near the bottom-right.
  5. Intersperse orange berry stems among the black leaves so they trail naturally.
  6. Hot-glue the largest pumpkins first on the bottom-left/centre, then add smaller ones near the bows.
  7. Check stability, tuck extra glue or wire where needed, and hide any visible glue.
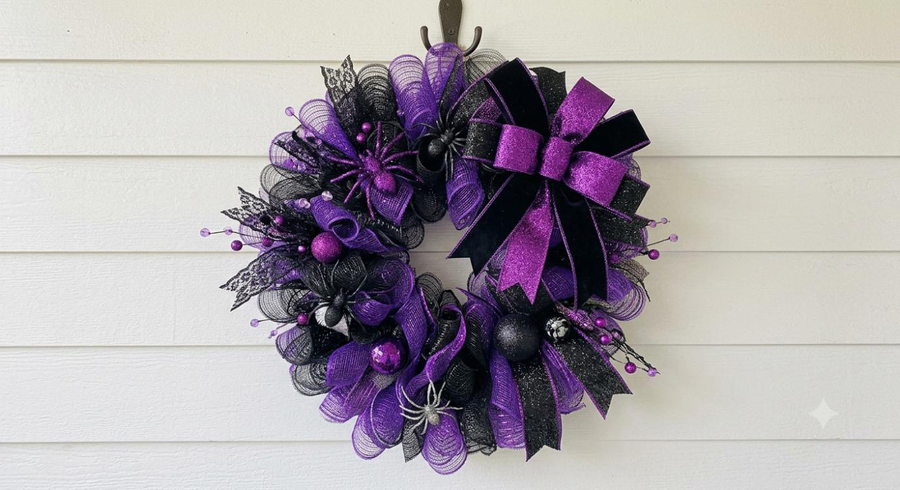
Purple & Black Sparkle Halloween door wreath

02

Purple & Black Sparkle

A glamorous, witchy wreath using glitter and rich colours.

Materials

  • 18″ metal wreath frame (with wire crossbars)
  • Deco mesh ribbon (10″ wide, solid black)
  • Deco mesh ribbon (10″ wide, sparkly purple)
  • Wire-edged ribbon (2.5″, solid sparkly purple)
  • Wire-edged ribbon (2.5″, black with purple glitter edges)
  • Sparkly black tinsel picks/garland
  • Decorative plastic spiders (2–3)
  • Mini skulls (sparkly purple or black, optional)
  • Floral wire
  • Hot glue gun and glue sticks

Steps

  1. Attach black deco mesh in large puffs every 6 inches around the frame, then weave purple mesh alongside for a dense blended base.
  2. Cut 12″ strips of the 2.5″ ribbons, overlap them, and wire them into the frame among the mesh puffs.
  3. Make a large multi-loop bow from the sparkly purple ribbon and secure it to the top centre or upper-right.
  4. Glue or wire sparkly black tinsel picks into the mesh for texture.
  5. Glue 2–3 spiders onto the mesh; add mini skulls in one or two tight clusters if desired.
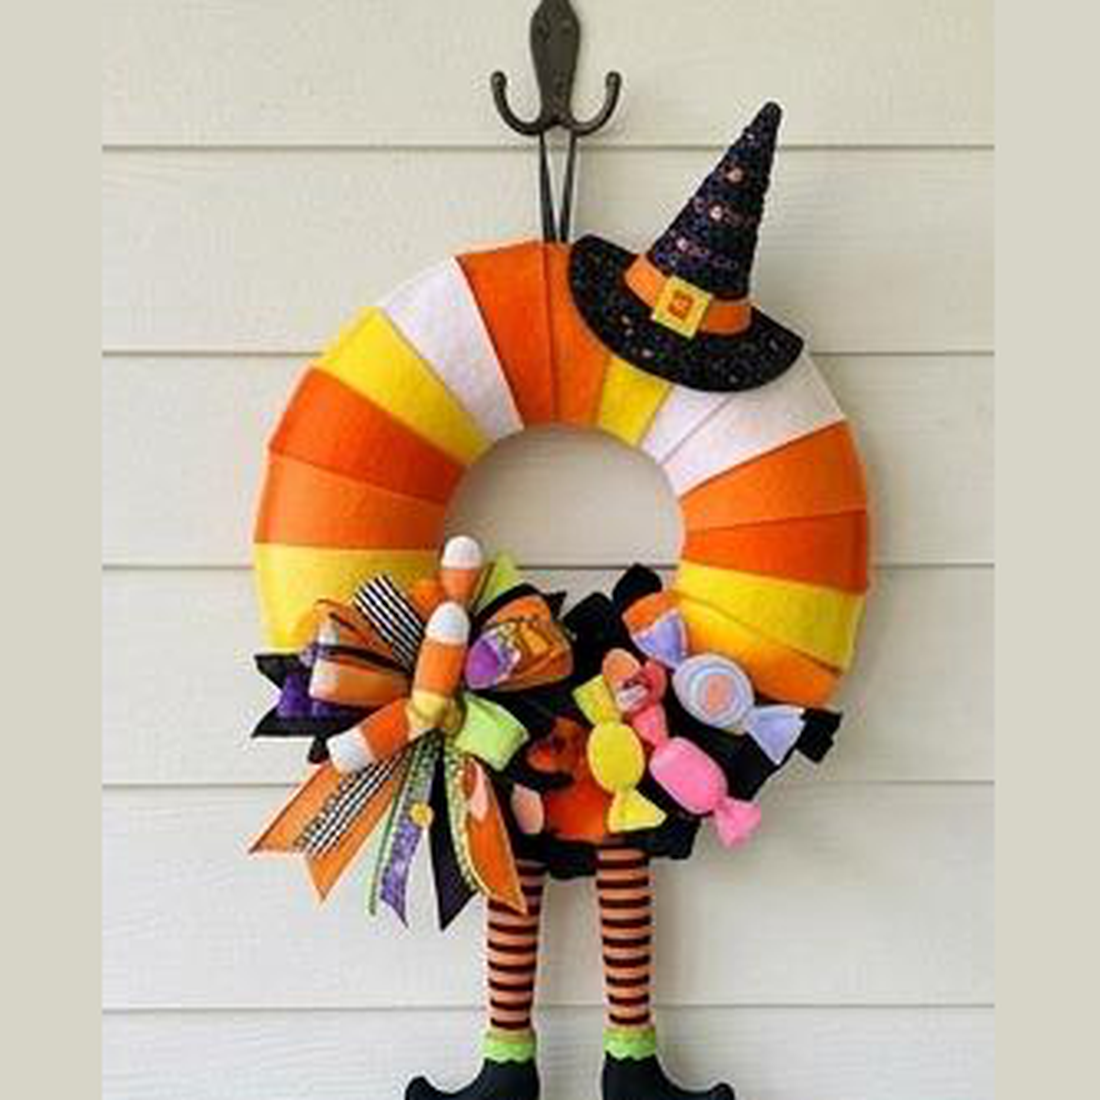
Candy Corn & Witch Halloween door wreath

03

Candy Corn & Witch

A bright, whimsical design perfect for trick-or-treaters.

Materials

  • 16″ or 18″ straw wreath form (leave plastic wrap on)
  • Craft felt in bright orange, bright yellow, and white
  • Miniature witch hat (black felt)
  • Whimsical witch legs (striped felt and black boots)
  • Wired ribbon in orange/black stripes, yellow polka dots, and lime green
  • Assorted artificial candy décor (lollipops, candy corns)
  • U-pins or floral wire
  • Hot glue gun and glue sticks

Steps

  1. Wrap the form with 4″ felt strips — yellow at the bottom, orange in the middle, white at the top — to resemble candy corn; glue ends on the back.
  2. Secure witch legs to the back bottom so the boots dangle outward.
  3. Glue or wire the miniature witch hat to the top-right curve, tilted slightly.
  4. Make a playful multi-ribbon bow and secure it to the bottom-left curve.
  5. Glue faux candies around the bow and a couple near the hat for balance.
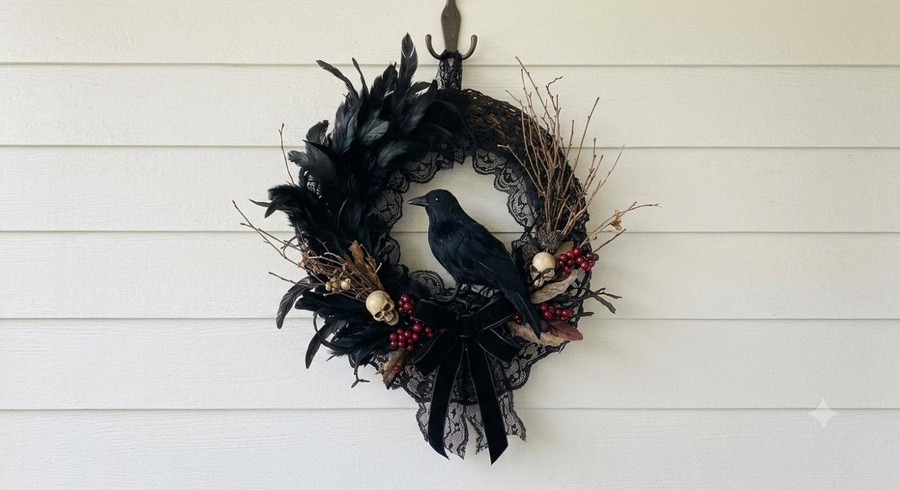
Raven & Lace Halloween door wreath

04

Raven & Lace

Elegant and gothic, using textures and naturalistic elements.

Materials

  • 18″ grapevine wreath form
  • Large black feathered raven (with clip or wire)
  • Black silk leaves/fern picks (3–4 large stems)
  • Dried natural twigs/branches (or spray-painted black)
  • Decorative red berry picks (sparse)
  • Black wired lace trim (3″ wide)
  • Wire-edged black velvet ribbon (1.5″–2.5″)
  • 1–2 smaller decorative birds (optional)
  • Floral wire
  • Hot glue gun and glue sticks

Steps

  1. Wire black silk leaves/fern picks to the centre-right and upper-left curves.
  2. Embed dried twigs so they stick out dramatically to the top-right and left.
  3. Clip or wire the large raven into the centre among the twigs and greenery.
  4. Wire sparse red berry picks among the black leaves near the bottom and left.
  5. Weave black lace around the grapevine base; secure with small dabs of hot glue.
  6. Make a classic multi-loop black velvet bow and secure it at the centre-bottom.
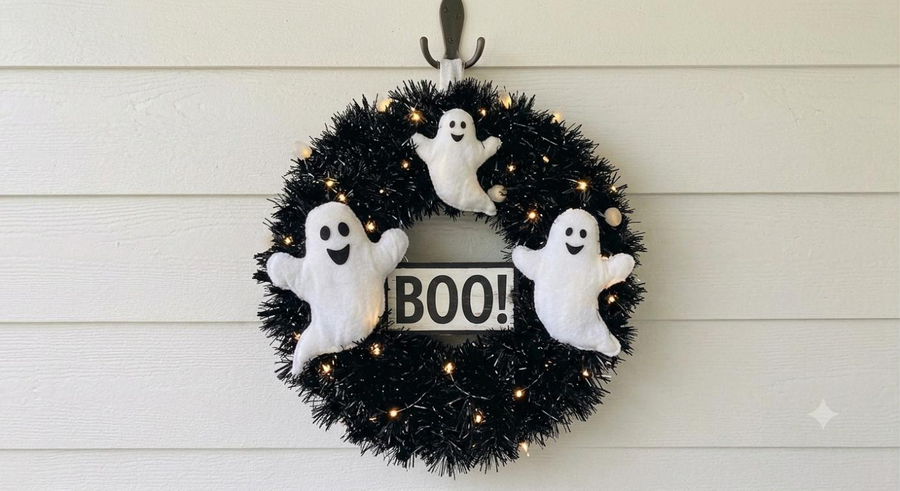
Ghostly Greetings Halloween door wreath

05

Ghostly Greetings

Simple, spooky, and lit — perfect for night display.

Materials

  • 18″ metal wreath frame (with wire crossbars)
  • Black tinsel garland (about 12 feet, thick)
  • 3–4 decorative white plush or foam ghosts
  • Miniature star-shaped battery fairy lights
  • “BOO!” letter sign (wood or plastic)
  • White wired ribbon with black stars (or similar)
  • Floral wire
  • Hot glue gun and glue sticks

Steps

  1. Wrap black tinsel tightly around the entire frame until dense; tuck the light battery pack into the back.
  2. Weave fairy lights evenly through the tinsel base.
  3. Hot-glue ghosts onto the tinsel — one large left, one right, one smaller above the sign.
  4. Wire the “BOO!” sign to the lower centre of the wreath.
  5. Make a large multi-loop star ribbon bow and secure it at the top centre.
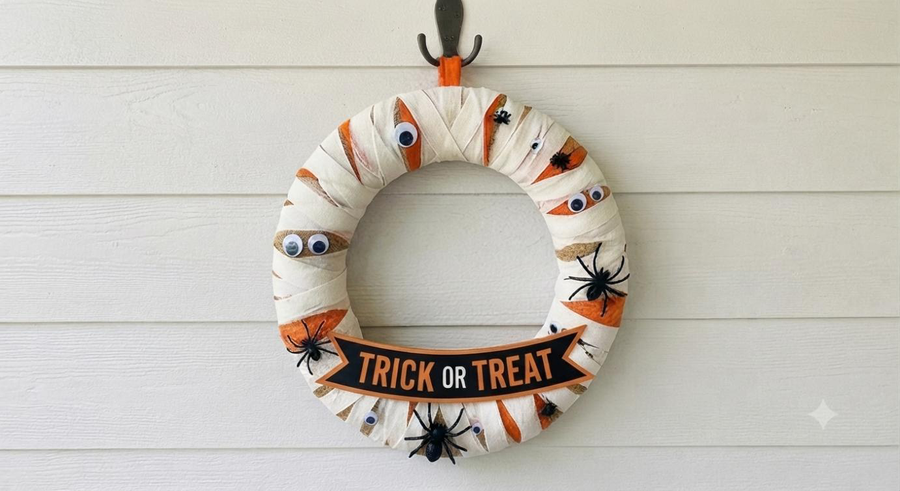
Mummy Wrap Halloween door wreath

06

Mummy Wrap

Creative, texture-heavy, and unique — with eyes peeking out.

Materials

  • 16″ or 18″ foam wreath form (flat back is best)
  • Gauze bandage rolls (3–4 rolls, white)
  • Assorted googly eyes (very small to medium)
  • Burlap wired ribbon (2.5″ natural)
  • Black wired ribbon with orange/white “TRICK OR TREAT” text
  • Floral wire (orange or black)
  • Hot glue gun and glue sticks

Steps

  1. Wrap the foam form snugly with gauze, overlapping layers; glue each roll end and continue until front and sides are covered.
  2. Add a looser second layer with crinkles; glue clusters of googly eyes so they peek from under the wraps.
  3. Make a rustic bow from burlap and text ribbon; secure it to the lower-right section.
  4. Add one or two more eyes near the bow and tuck ribbon tails into the gauze.
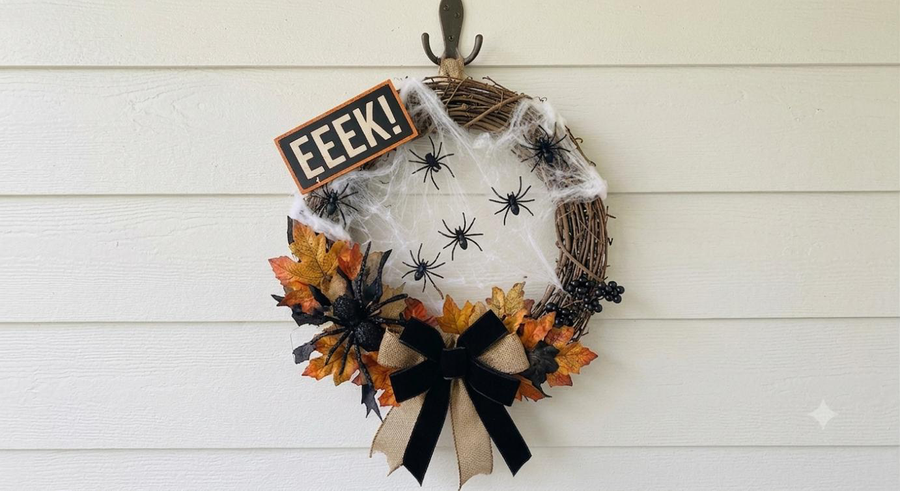
Spooky Spiderweb Halloween door wreath

07

Spooky Spiderweb

Classic Halloween — spiders, leaves, and webs.

Materials

  • 18″ grapevine wreath form
  • Stretchable spiderweb material (white)
  • Assorted artificial black spiders (varied sizes)
  • “EEK!” (or “SPOOKY”) sign plaque
  • Artificial autumnal leaf stems (orange, yellow, brown)
  • Black and white striped wired ribbon (1.5″–2.5″)
  • Burlap wired ribbon (natural or orange)
  • Floral wire
  • Hot glue gun and glue sticks

Steps

  1. Stretch web across the open centre and secure edges on the back with hot glue or U-pins.
  2. Wire or glue the “EEK!” plaque to the lower-right on the grapevine.
  3. Arrange autumnal leaves in a flowing arc from the lower-left centre upward.
  4. Hot-glue larger spiders on the web; place smaller ones among leaves and near the sign.
  5. Make a layered striped-and-burlap bow and wire it to the lower-left for balance.
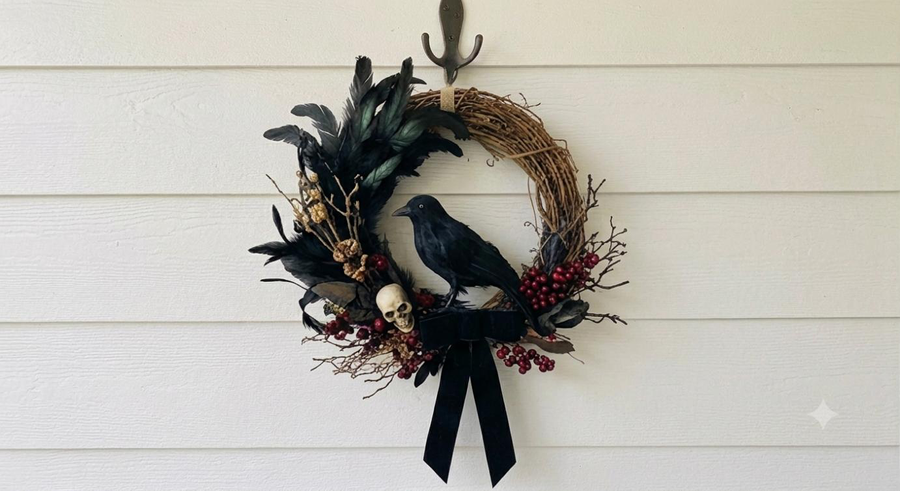
Classic Crow Halloween door wreath

08

Classic Crow

Like Raven & Lace, with a cleaner, slightly more autumnal feel.

Materials

  • 18″ grapevine wreath form
  • Large black feathered crow (with clip/wire)
  • Dried natural twigs/branches
  • Black feather picks (3–4)
  • Red berry picks (fuller clusters)
  • Distressed white wooden sign (e.g. “SPOOKY”)
  • Black wire-edged velvet ribbon (1.5″)
  • Natural twine (optional, for hanging the sign)
  • Floral wire
  • Hot glue gun and glue sticks

Steps

  1. Weave dried twigs into the form so they stick out dramatically upper-left and upper-right.
  2. Clip or wire the crow into the centre among the twigs.
  3. Wire red berry clusters and black feather picks in a symmetrical arc framing the crow.
  4. Hang or wire the wooden sign below the crow (twine from the top-centre curve works well).
  5. Wind black velvet ribbon through the grapevine and around the berries; add a simple loop at the sign hanger.
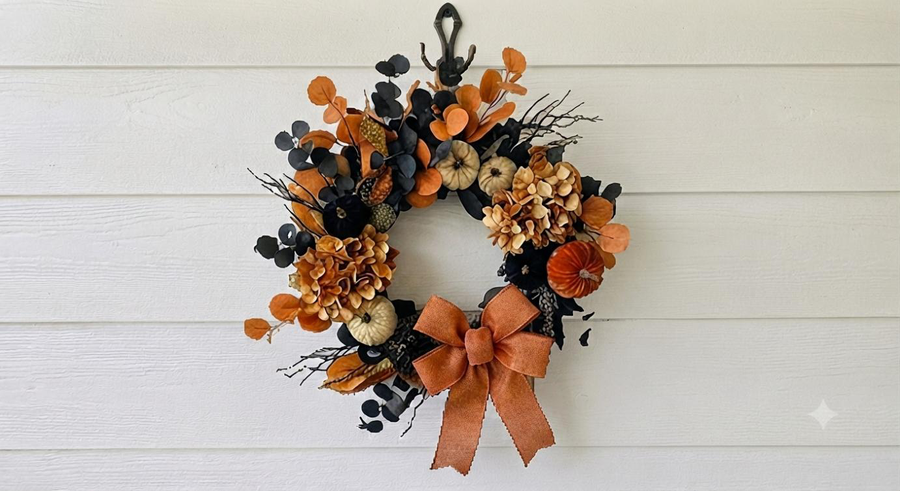
Fall Harvest Halloween door wreath

09

Fall Harvest

Almost purely autumnal, with only subtle spookiness.

Materials

  • 18″ grapevine wreath form
  • Faux autumnal floral stems (sunflowers, hydrangeas, eucalyptus)
  • Faux mini pumpkins (orange, yellow, off-white — 7–10)
  • Dried wheat stalks (small bundle)
  • Natural pinecones (small to medium)
  • Large pre-made rustic bow (orange/brown/plaid/burlap)
  • Floral wire
  • Hot glue gun and glue sticks

Steps

  1. Wire eucalyptus and wheat from the upper-right so they flow downward along the curve.
  2. Hot-glue or wire the large rustic bow to the lower-right.
  3. Hot-glue the largest flowers near the bow and at the upper-left curve.
  4. Intersperse mini pumpkins and pinecones around flowers and bow along the bottom half.
  5. Fill gaps with loose berry stems or smaller leaves.
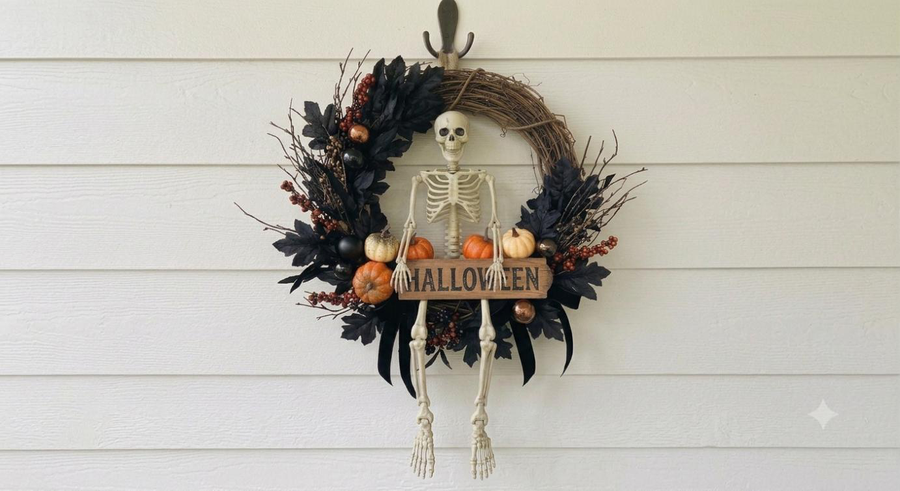
Skeletal Chic Halloween door wreath

10

Skeletal Chic

Modern and minimalist — a metal hoop with focused elements.

Materials

  • 18″ gold or black metal ring wreath form
  • Decorative articulated skeleton figure (approx. 12″)
  • Black silk leaves/fern picks (2–3 large)
  • Natural dried twigs (or spray-painted black)
  • Red berry picks (fuller clusters)
  • “HALLOWEEN” wooden sign
  • Black wired ribbon with text or pattern (1.5″)
  • Tiny miniature orange pumpkin (optional)
  • Floral wire
  • Hot glue gun and glue sticks

Steps

  1. Secure dried twigs so they sweep dramatically to the upper-right and left.
  2. Wire black leaf picks near the top-left and a couple near the bottom-right.
  3. Wire the skeleton so it sits in the centre opening; pose one arm on its knee and glue a tiny pumpkin in its hand if using.
  4. Wire the “HALLOWEEN” plaque to the lower centre of the hoop.
  5. Add a small text-ribbon bow near the skeleton’s foot; frame with black leaves and red berries on the left.

Daily in October

The Halloween Calendar

Thirty-one numbered doors. A few surprises are open to everyone; members get the full month, earn XP, and can climb the leaderboard. Open a door at midnight — London time — and meet a new Grumpy Paranormal character every day.

  • Collectible characters with rarity tiers
  • Share your reveals with friends and family
Go to the calendar →
Halloween Calendar artwork with countdown clocks and thirty-one numbered doors beneath a haunted rooftop

Little Spooks

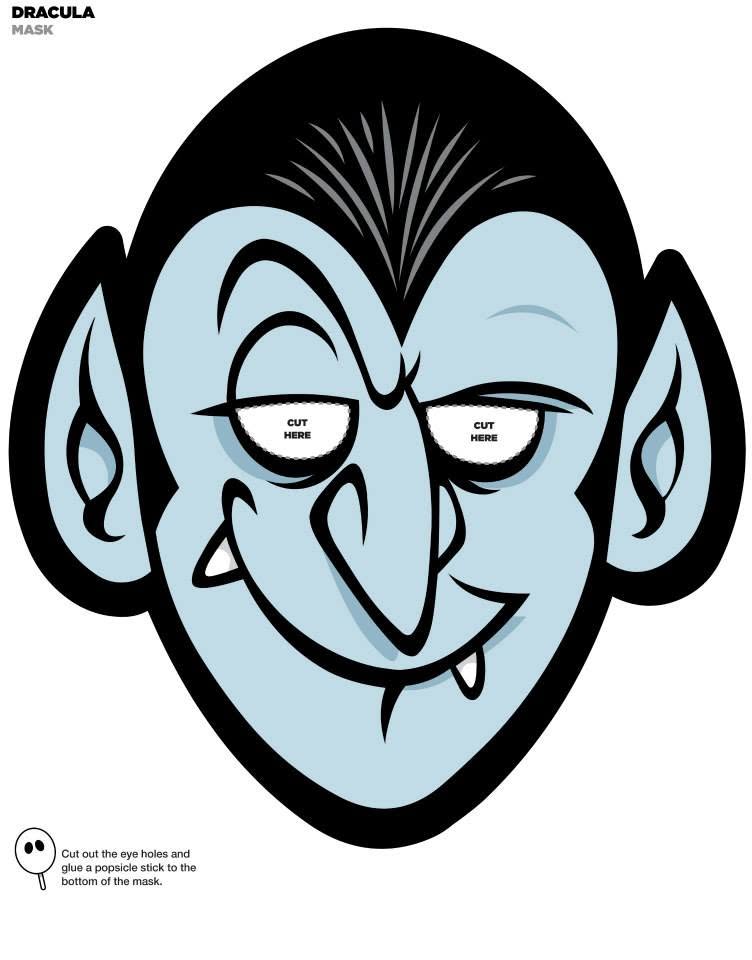
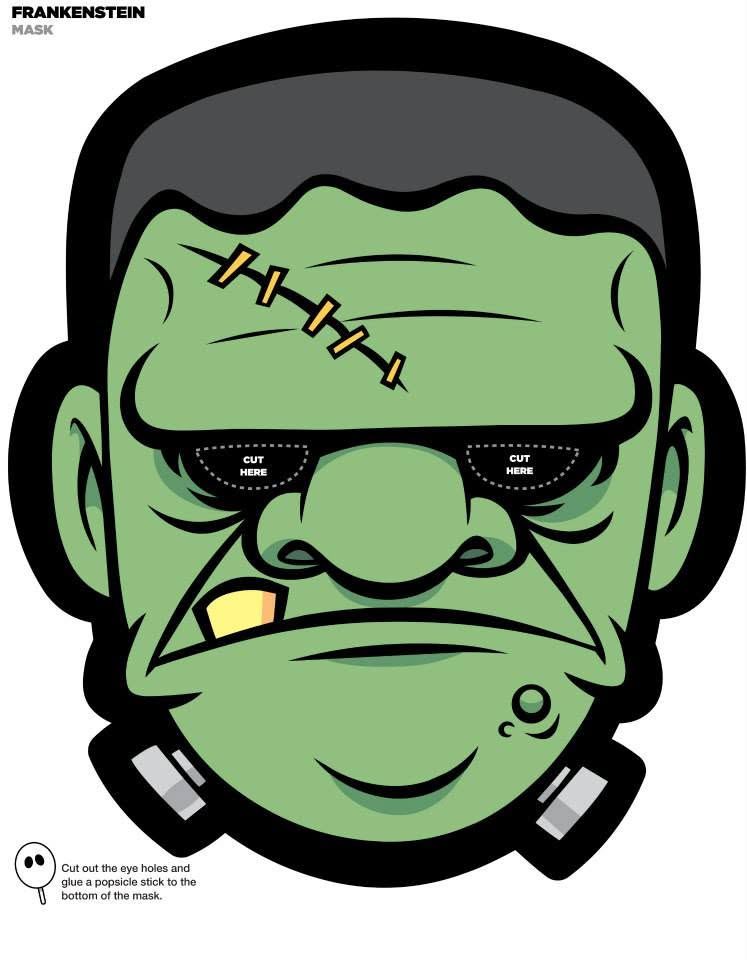
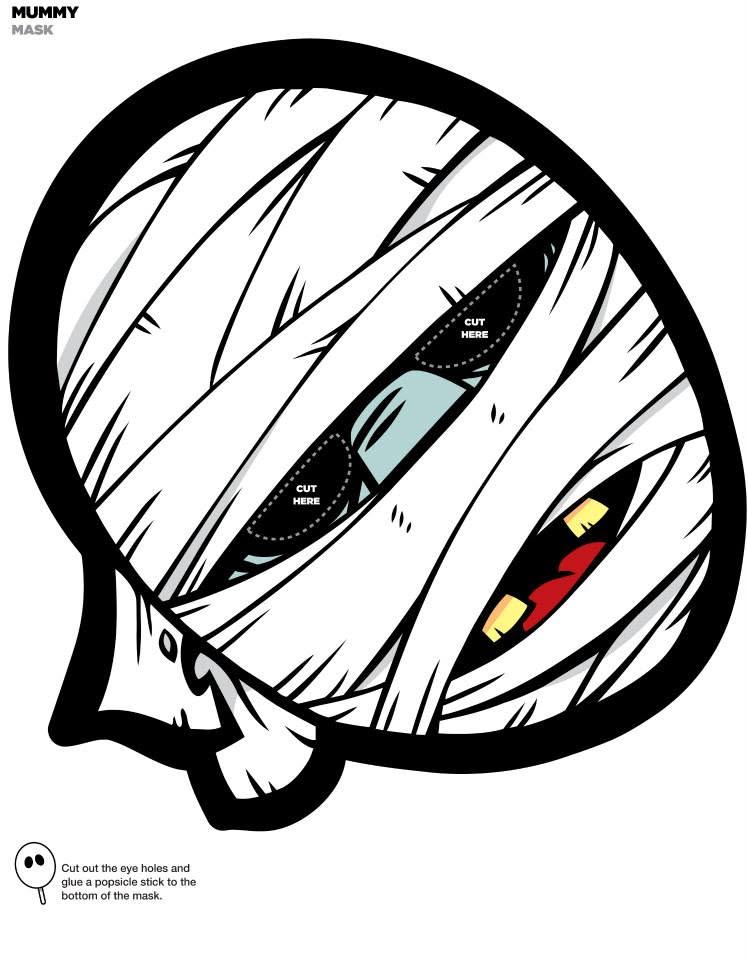
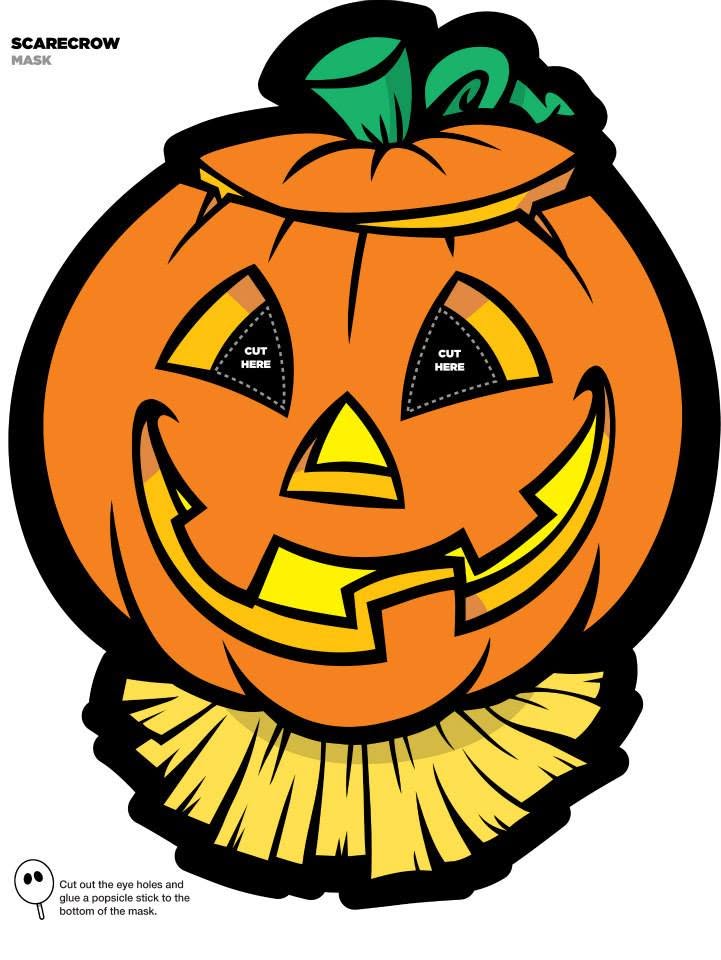
Free printable Halloween masks

Print on A4, cut the outlines, punch the eye holes, glue a popsicle stick. Five classic monsters — no signup required.

Safer celebrations

Printable Trick & Treat certificates

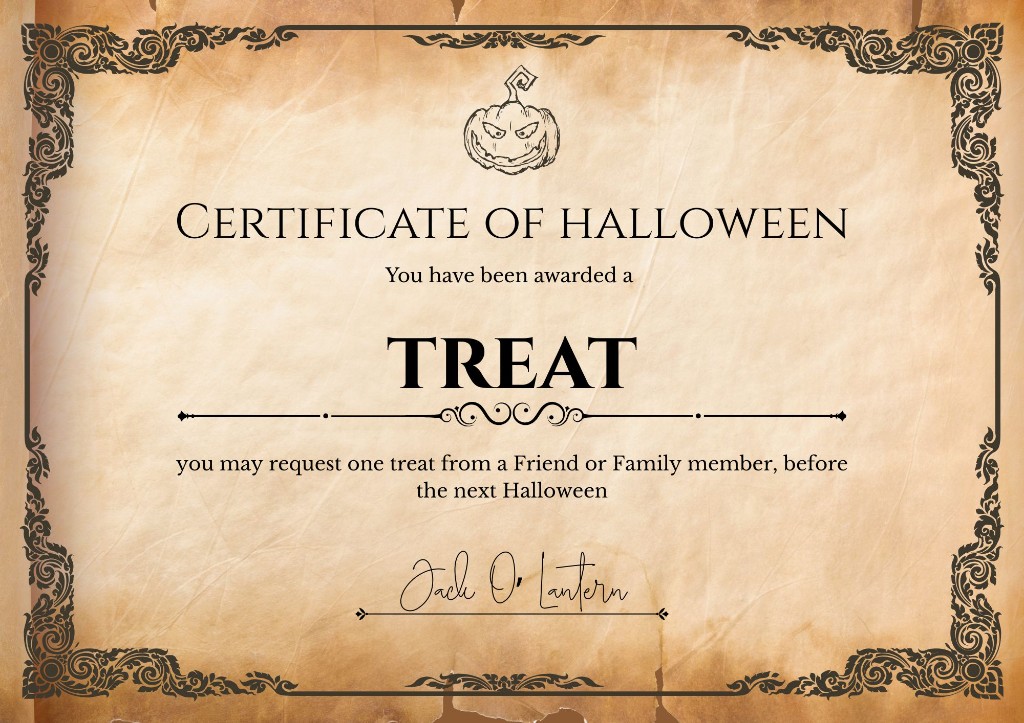
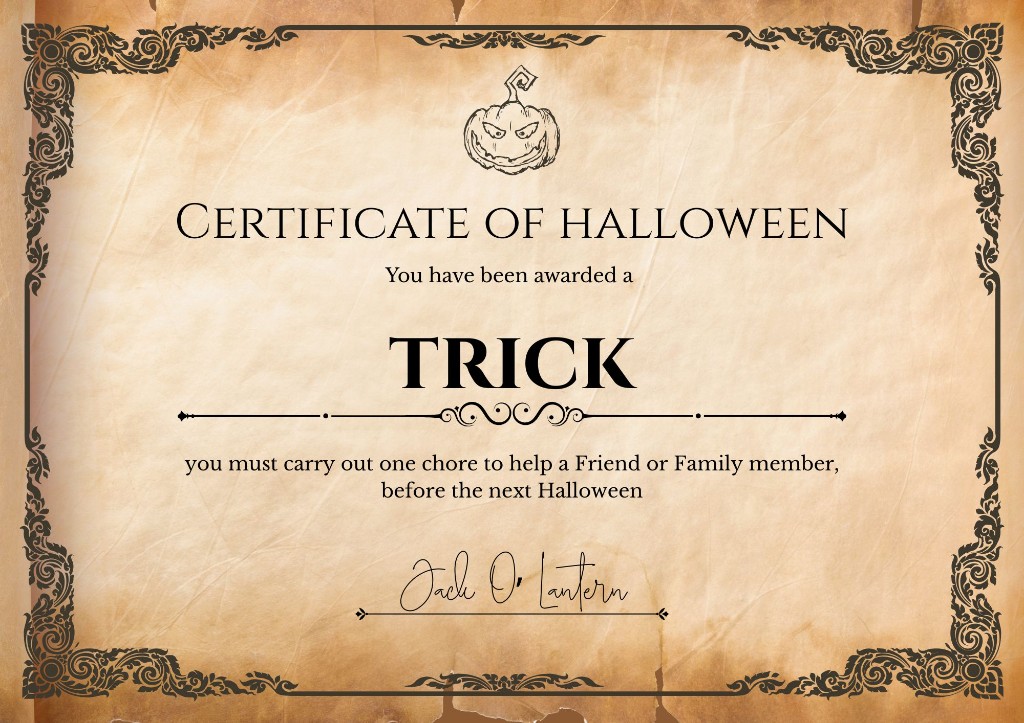
Hand these out among friends and family. A Treat certificate lets a child redeem one treat from someone they know. A Trick certificate awards one helpful chore — signed by Jack O' Lantern.

  • Treat Certificate printable Halloween certificate

    Treat Certificate

    Award a treat a child can redeem from a friend or family member — a safer alternative to knocking on strangers' doors.

    Download & print
  • Trick Certificate printable Halloween certificate

    Trick Certificate

    Award a friendly trick: one helpful chore for a friend or family member before next Halloween.

    Download & print

Trick or treat night

The pumpkin at the door

A simple neighbourhood code: show a pumpkin if you want callers — leave the step bare if you don’t. Teach children to look for the signal before they knock, and households can opt in or out without awkward notes.

01

We’re taking part

Pumpkin at the door

A carved or lit pumpkin (or a clear jack-o’-lantern) by the front door is a friendly yes: trick-or-treaters are welcome to knock.

02

We’re sitting this one out

No pumpkin outside

No pumpkin on the porch or doorstep means please don’t call. Respect the signal — many households prefer a quiet night.

  • A carved pumpkin, lit jack-o’-lantern, or clear porch pumpkin all count as “yes.”
  • Indoor decorations alone are not an invitation — look for a pumpkin outside by the door.
  • If you’re not taking part, skip the outdoor pumpkin and keep porch lights low; callers should move on politely.

Trick or treat safely

A few simple safety tips

Door-to-door can be wonderful — and a little planning keeps the night magical. Prefer to stay closer to home? Use the Treat and Trick certificates above.

  • Go with a trusted adult

    Younger children should always trick-or-treat with a parent, carer, or known adult. Agree a meeting point if anyone gets separated.

  • Stick to familiar streets

    Choose well-lit roads you know. Skip dark shortcuts, empty parks, and houses that look closed or unsafe.

  • See and be seen

    Use reflective strips, glow sticks, or a torch. Costumes should not block vision — cut eye holes carefully or carry a mask on a stick.

  • Check sweets before eating

    Adults should inspect treats at home. Throw away anything unwrapped, damaged, or homemade from an unknown source.

  • Mind the roads

    Cross at lights or zebra crossings. Keep phones away while walking and watch for cars pulling onto driveways.

  • Safer “trick or treat” at home

    Prefer party games, church or school events, or our printable Treat and Trick certificates with friends and family.

After dark

For the curious and the serious

Halloween is fun at the front door — and fascinating behind it.